At Wacom we often work together with Corel® and we figured there are some best practices we can share with you that you might not know about.
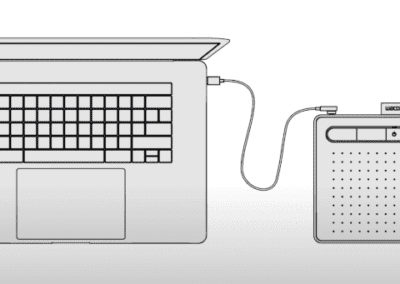
 For beginners and hobbyists, we offer Corel® Painter® Essentials™ 6 in a bundle with our new Wacom Intuos pen tablet. Available for you are a wide variety of painting styles, award-winning Natural-Media® brushes and photo effects to create an authentic, hand-painted look.
Multi-touch
Corel® Painter® supports working with gestures to simultaneously pan, rotate, and zoom the canvas when you enable multi-touch for your Intuos Pro tablet and Painter®.
Try this:
Enable touch input in your tablet properties. Now you can rotate and move the canvas at the same time by moving two fingers in a circular motion while simultaneously swiping them across the tablet. You can also rotate and zoom by moving two fingers in a circular motion while simultaneously pinching the fingers together, or pulling them apart. Just double tap to reset the canvas.


Brush Tracking
When you draw with traditional media, the amount of pressure that you use with a tool determines the density and width of your strokes. Using a Wacom tablet with Corel® Painter® gives you the same kind of control.
Because each artist uses a different strength or pressure level in a stroke, you can adjust Painter® to match your stroke strength by using the Brush Tracking preferences.
![]()
Try this:
If you notice abrupt changes in the width or density of your strokes, you need to adjust your Brush Tracking preferences.
In Painter® preferences go to Brush Tracking. Apply a typical brushstroke, such as a wavy stroke, to the scratch pad. Corel® Painter® then uses your stroke to calculate the appropriate pressure and velocity settings for all brush variants. You can also apply custom settings to specific brush variants for even more control over brushstrokes.
![]()
Tilt and Pressure
Many of Painter®’s brushes respond to the stylus tilt and direction and produce thick to thin strokes that may also express the selected paper texture depending upon the media chosen.
Try this:
Select the Thick Paint – Grainy Fine Rake variant and stroke the canvas from top to bottom with the stylus held vertical. This produces a thick stroke.
Now tilt the brush and stroke the canvas from top to bottom. This produces a thin stroke. Experiment with varying pressure along with tilt and pressure and you will notice the resulting strokes are highly pressure sensitive and will exhibit the currently selected paper texture in the areas of light pressure and also vary from thin to thick based on light to hard pressure.

Stylus Direction
Many of Painter®’s brushes respond to direction and will flow paint in the direction the stylus is pointing.
Try this:
Select Particles – Flow Fur Tail 2 and create a squiggly stroke to experience the fur flowing in the direction of the stroke. Now select an Airbrush and watch as the paint splatters in the direction you are pointing.

Power User Tip: Expression
Painter® lets you control brush effects along the stroke based on a number of real-time input factors. For example, many brushes vary their opacity or size in response to changes in stylus pressure, which is their default setting. You can modify or add expressions for brushes to suit your painting needs by using the Expression settings.
Try this:
Select Chalk, Pastel and Crayons – Oil Pastel. Then open up the Advanced Brush Controls from the Property Bar. Create a stroke on canvas that varies from light to hard pressure. The resulting stroke does not vary the size of the brush but does show more paper texture with light pressure and less with hard pressure.
Now click on the Size tab in the Brush Controls and switch Expression to Pressure. Change the Minimum size of the brush to 15%. Stroke the canvas with light to hard pressure and now the stroke size varies in width based on pressureClick here for more information about “pressure”.
There are too many brush expressions to mention in a tip but we encourage you to experiment with the wide variety of options.

Thank you for reading!
We hope these tips were useful to you. Remember that we have a great creative communities on Wacom´s social channels:
Instagram – Twitter – Facebook – Youtube